• Enter your email address to subscribe to this blog and receive notifications of new posts by email.

    Join 2 other subscribers
  • Let’s Tweet

  • Me

    Rockin' Party Ideas on a Realistic Budget!

Cake Balls: Take Two

Halloween Cake Balls

Spooky AND tasty, oh and of course CHEAP!

The first time I made cake balls, I made the cake, threw it in a bowl and mixed in the frosting.  THIS time, I made the cake, let it cool, frosted it, and chilled the cake.  THEN, I shaped the cake balls.  I actually shaped little ghost shapes for the Halloween Party.  The shaping part was easy.  The not so easy part was the white chocolate melting.  I tried microwaving white chocolate chips, and it was a fine balance to keep them from seizing up.  Needless, to say that didn’t work.  Next step, using the baking chocolate verison in a double boiler.  Still not as thin as I would have liked.  Then I remembered.  I needed to add a little bit of butter to the chocolate and a teensy bit of cream for a more ganache like consistency.  Voila!  Cake ball magic.

These will probably not grace the pages of Living, but dang, they’re good.  I may still thin out my chocolate enough and add some food coloring.  These goblins need faces.


Halloween Party: It’s the Final Countdown.

I’ve spent the past two days putting up Halloween Decorations.  Things are looking great.  But today my focus is wrapping up costumes.  I like to be sure my Halloween costume, and my kid’s costumes are ready for party time.  So I gave mine a whirl this morning.  The following is a list that will help you avoid a meltdown concerning your costume.  Follow these directions and you’ll be off to a good start to your party.  Who wants to be the worst dressed at their own event?  So let’s get going.

  1. Gather the garments.  Do they require specials shoes, belts, jewelry, capes, makeup, wigs, hats?  make sure all parts and pieces are put in the closet of the person who will be wearing them.  (Or any place that YOU KNOW WILL WORK).
  2. Give it a dry run.  Put the majority of the stuff on.  Do any adjustments need to be made?  Want to add or subtract something?  Need any last minute purchases? 
  3. Practice your make up/hair.  If your costume requires detailed makeup.  You may want to at least make sure your bases are covered and give it at least an outline.  You’ll be suprised what might be better learned today, instead of the day of your Halloween Party. 
  4. Pamper yourself.  Need a mani/pedi?  An eyebrow wax?  A deep conditioning hair treatment?  To Tan?  Today is that day.  Take a minute, even if you do this stuff yourself, you’ll want to be relaxed and refreshed to handle the next few days.  So treat yourself, and use the quiet time to renew your creativity and give you a fresh perspective.

After you’ve finished this, you’re probably ready to look at this whole thing with a better mindset.  Now take a half hour or so to tidy up your to do list.  Tomorrow, it’s time to get crackin!  Oh, and today.  Hit one room.  Clean it and do a littel decorating.  Get out some candles.  It will only take a half hour at most.  Put on some great music.  Believe me, when the party rolls around, you’ll be glad you did.

Halloween Party: Print this one out.

Getting your Halloween Party ducks in a row.  If you haven’t been following along, check the Halloween Category over to the right, you’ll be up to speed in no time flat.

Mission #1:

Phew!  My Halloween Party plans were put on hiatus for a few days while we fought off the flu.  Most of the plans included deep cleaning.  I use Flylady’s detailed cleaning list for zones to do this.  You can find them in pdf format hereNormally, I would attack each zone/room one day at a time, and I have sort of been doing that in between checking temperatures, meds, dr. calls and such.  But, the important thing to remember is that it doesn’t have to be perfect, and it can be done in 15-30 minute spurts.  Just stay focused on the room you are in, and set a timer.  I  usually break it down like this:

  1. Throw out any trash (fruit roll up wrappers, old magazines/catalogs. etc.)
  2. Take things that don’t belong in the room you’re in and put them in the room they do belong in.  (also can you make a Goodwill trip and donate anything…check for that too.)
  3. Look Up!  Check for cobwebs (although 4 Halloween they’re kinda nice LOL).  Beat ’em down with a broom. 
  4. Windows and sills and trim.
  5. Doors and baseboards.
  6. Dust flat surfaces
  7. Do the floors.
  8. Spray with air freshener to give yourself a happy smell reward for all your work. 

Seriously, this doesn’t take as long as you think.  Just do it for a half an hour, then sit with your feet up and a glass of water (flushing out fat for the big day is always good.)  I would do no more than 2 rooms in a day, 3 at max.  We still have other fun stuff to do, and we don’t want to waste all that good energy on cleaning.

Mission #2:

Review your menu grocery list, and finish purchasing anything you need.  Make sure you have these items too.

  1. Plates
  2. Napkins
  3. Cutlery
  4. Streamers
  5. Candles
  6. Ice
  7. Beverages
  8. Cups
  9. Toilet Tissue (don’t want to run out of that)


Mission #3:

Take one morning or afternoon to finish up baking or any make ahead items you can.  Let’s get those things out of the way.  Less to worry about for next week.


Mission #4: 

Decorate at least one zone.  Remember, we were picking about 3 areas to decorate, if you haven’t done any decorating, get two zones done, if you have, one will do.  Again, less running later.  This doesn’t have to be expensive or crazy, I gave you some ideas in other blog entries.  Cheapy masks, plastic pumpkins, real ones, streamers, rubber snakes, bugs, bats or rats, old wine class=”mceItemHidden”> bottle, old tools, and candles do just fine.  Heck print off some old photos and hang those around.   Here’s one more last-minute Halloween Party decoration thought…


Shadow puppets.  Nothing is creepier than shadows.  And you can cast your own easily.  Martha has a good tutorial on her site.  Go Check it Out.

Here’s an AWESOME example of one that I found on Etsy.  The shop is called Isabella’s Art

Go get a gift or some inspiration.
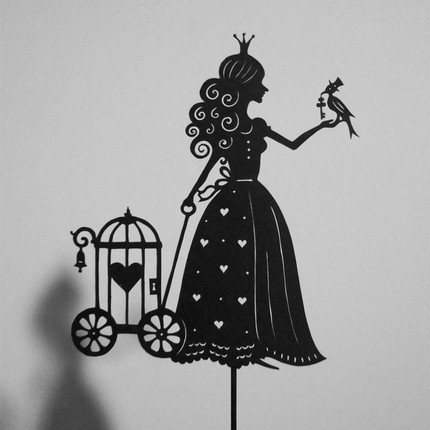
Hmm, great idea, and cheap

Hmm, great idea, and cheap

 
Mission #5:
 
Borrowing.  Are you borrowing any items from people?  Get those arrangements settled.  It will only take a couple phone calls.  You can do it.
 
Now before you get all overwhelmed and say this is going to take too long.  Or, I can’t handle this.  Let’s recap. 
  1. The cleaning is going to take 1 hour.
  2. You’re going to the grocery anyway, the list review might take 15 minutes,
  3. Bake/cook for one hour only.  You’ll be amazed how much you can do.
  4. Decorating your zone.  Do it for 30 minutes and then quit!  That’s good enough.
  5. 10 minutes worth of phone calls.

So that is about 3 out of 72 hours of your weekend to get you on your way to a rockin’ party.  Think about how much time you give your job, and this is FUN and you’ll be accomplishing a bunch for your mental sanity and giving your friends and family a good time.  I think that’s worth 3 hours.  You CAN do it.  It would probably do you some good to get a walk in as well.  Just go out and get the “stink blowed off”, as my grandmother used to say.  Drink in the fall air and show those bones and muscles a good time.

Halloween Party: Eye Makeup. How fun!

Lots of fun ideas for Halloween on Makeupgeek.com.  I love this stuff, so fun.


Just thought I’d share for fun!  Enjoy!

Halloween Party: The weekend agenda.

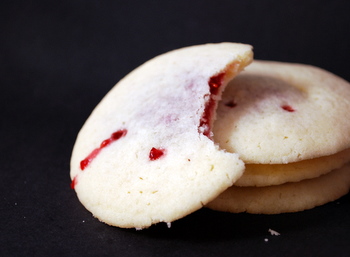
Ok, I have almost all of the ingredients I need for the Halloween Party Menu.  Today, I am going to make these cookies. 

Vampire Bites.  What a cute & simple way to celebrate the night!

Vampire Bites. What a cute & simple way to celebrate the night!

I found this cookie recipe on the Baking Bites blog.  Awesome resource for very dessert recipes, go check it out. 

I usually like to make sure I like the stuff I plan to serve at this shindig.  And yesterday I made a recipe that I found while looking up some cheap ideas for decorations.  This one is called Sliced Snakes & Veggies Over Maggots. 

Sliced Snake and Veggies over Maggots

Sliced Snake and Veggies over Maggots

It is INCREDIBLE.  I could eat this every day.  I was so pleased because the recipe is cheap and simple, and healthy.  What more can a girl ask for?   This Halloween party recipe is care of  The Ghostess.  While on the subject of the Ghostess, I have to say, her site is sooooo cool.  From what I can tell, she is a veteran at Halloween Parties.  AND she shares tips and tricks throughout her site.  Pictures galore can be found of everything from invites to decorations.  I really enjoyed perusing through her haunt and I hope you do too.  If not, you’re really missing out on a great resource. 

So this weekend will be full of baking, and after I have crossed off my baking list, I’ll make a plan for the rest of these ghoulish dishes. 

Oh, I am making those paper mache pumpkins, and so far, so good.  It’s actually kind of fun.  My kids want to help, so that’s a good sign. 

If you don’t have a lot of decorations yet.  Here are a couple of cheap items that can make big impact. 

  1. Streamers
  2. Table cloths (Dollar Tree, and they have a lot more stuff too)
  3. Candy corn in glass containers (Dollar Tree has some cool glass containers)
  4. Those pumpkin buckets you use for Trick or Treating (Walmart has neon versions for 94 cents).
  5. You can always use Martha Stewart Templates to make something cool.
  6. Old tools from the shed.
  7. Spider web from dollar tree/walmart
  8. Old sheets
  9. White candles  (I like dripping the wax from a red crayon or candle over these to make them look bloody).
  10. Make a scarecrow out of some old jeans and shirt stuffed with all those plastic bags you have hanging around.

Check back, this thing ain’t over by a long shot!

Halloween Pics, Just for Fun.

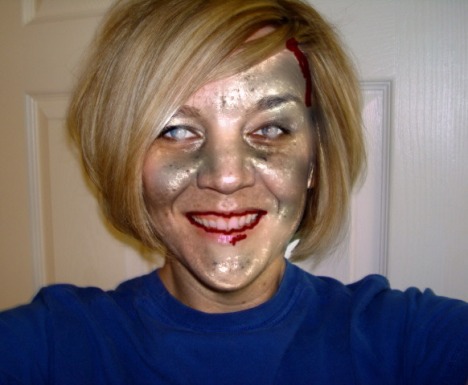
A little fun filled Halloween Editing care of Picnik.

A little fun filled Halloween Editing care of Picnik.

You too can be one hot zombie.  Just go to Picnik’s Website, upload one of your photos.  Then use some of their FREE features, OR upgrade and really do yourself up right.  Seriously, these can be really fun portraits of guests to do for a Halloween Party.  Have your own zombie gallery.  Or just use your own pic as a working guide for your zombie costume.  Have fun, but BEWARE, it’s addicting.

Halloween Party Check Point: 3 Weeks Out

Yesterday I delivered a number of Halloween Party Invitations dressed as Cruella DeVille.  I still have a few left to go.  Here’s what happens each year after I deliver invites.  Panic sets in.  I have no idea why, but just a little bit of panic starts to settle in and drive me nuts.  SO it is imperative that you have that handy dandy notebook to go back to in times like this.  Oh, I’ll be fine, but that dang notebook keeps my head on straight.

Here’s what’s happening this week.

  1. Deliver the remainder of the invites.
  2. Set in concrete all of the recipes I will personally make for the party…done
  3. Get those ingredients in list form in my notebook…done.
  4. Bake and Freeze at least one recipe…done.
  5. Purchase the remainder of  the baking and spice ingredients of those recipes on store run for the week. (check sales online).
  6. Set in concrete which zones I will definitely decorate. (Kitchen, Dining, Entry Inside and Out, A little in the garage.)
  7. Narrow down my costume options and do a Goodwill run.
  8. Make a good playlist.  Even if it’s just on paper for now.
  9. Make paper Mache Pumpkins like these.  (Click on the pic to see how.)

    These awesome Halloween decorations are PAPER MACHE.  Can you believe?

    These awesome Halloween decorations are PAPER MACHE. Can you believe?


I hope you all have your to do list going.  Your invites sent out, or least heading out this weekend.  Most of all DON’T PANIC.  Just quit and come back to it if you feel overwhelmed.  Go for a walk, do a heavy duty workout, bake something, read, but don’t freak out.

Halloween Tree Part 2

This is part two of my Halloween Tree instructions.  See the Halloween Category to the right for part one. 

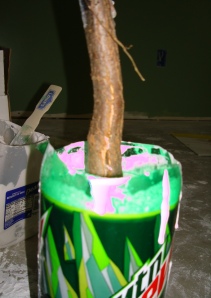
For the base of the tree I have set the tree in Plaster of Paris.  You just mix the Plaster of Paris with water according to the instructions on the box (they sell this stuff at Walmart btw).  Once you get it mixed up in a container that will fit your “tree” it’s time to place the tree.  You might want to do this in a place where it can be held up by a rope or something shile the Plaster of Paris dries.  I propped mine up with the ceiling (big tree).

Halloween Tree sitting a Plaster of Paris bath.  Pretty 2 liter holding it in place.  I'll be hiding that sucker later.

Halloween Tree sitting a Plaster of Paris bath. Pretty 2 liter holding it in place. I'll be hiding that sucker later.


After this dries (it took about an hour and 45 minutes, maybe less.  I’m not sure, I went to the store while it was drying.)

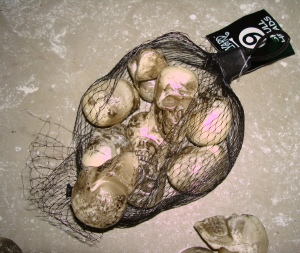
Halloween Decorations care of Dollar Tree

Halloween Decorations care of Dollar Tree

Hang any decorations you like on your tree.  I do not suggest putting lights on here because it’s not very safe.  Your regular lights in your house will still provide a little sparkle with the glitter.

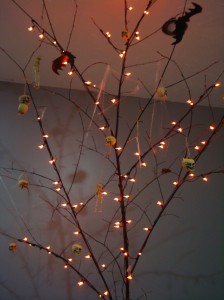
Halloween tree, my final versioin.

Halloween tree, my final versioin.

I am going to place the base with the two liter bottle in a planter.  I’ll just cover the two liter up with some fabric.  Hmmm, maybe some of the fabric I dyed with those walnuts I picked up along the road.

Halloween Party Idea: The tree part one.

This project makes a great addition to your Halloween Party decorations because it is virtually free, and if you don’t have the supplies on hand, you can get them pretty cheap.

Supply List:

  1. Large branch that has several mini branches that would look like a Charlie Brown Tree. (Free, just find one)

  2. Black Paint ( I used spray paint) ($3 at the most)

  3. A surface to paint on (I used some black plastic) Free, whatever you have.

  4. Gloppy Craft Glue (comes with the glitter but you could use Elmer’s  we’ll say $1 Dollar Tree)

  5. Glitter in your choice of color(s)  ( I used red) ($1-$7 depending on where and how much.  I recommend Martha Stewart Glitter at Michael’s Craft Store and if you buy the three pack, it comes with the glue.  And you can go to the Michael’s site and print a 40% off coupon.

  6. Anything you want to hang from the tree. (I’ll get to that in the next post)

  7. Plaster of Paris (You can get a big ol’ thing of this for about $5 at Walmart in the kids craft department.)

  8. A container to put your tree in, something junky because we’re holding it up with plaster of paris.  This will be at the base of your tree.  I am going to put mine in a milk jug, and then sink the jug into an old planter I have.

This whole project might run you around $15 assuming you have none of the supplies.  My mom called me from a local hardware chain where they were selling these for $70.  So, I’d say $15 ain’t bad.

Here’s how it’s gone down so far.


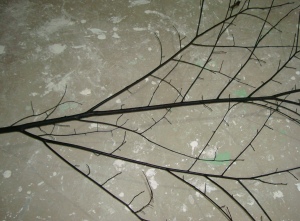
This is my bare Halloween tree.  Look for something similar with little branches on it.
This is my bare Halloween tree. Look for something similar with little branches on it.


Spray paint it black in a ventilated area, Put something down to protect the surface.  Allow to dry.

Spray paint it black in a ventilated area, Put something down to protect the surface. Allow to dry.

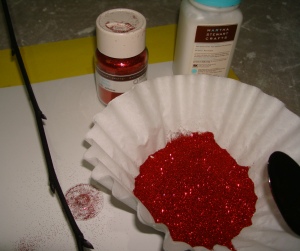
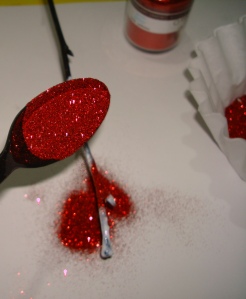
Gather glitter supplies.  I keep my glitter in a coffee filter so I can scoop it w a spoon & let the excess fall in the filter.  Or use a bog ol piece of paper for larger areas you plan to glitter.

Gather glitter supplies. I keep my glitter in a coffee filter so I can scoop it w a spoon & let the excess fall in the filter. Or use a bog ol piece of paper for larger areas you plan to glitter.

Brush a branch with glue.  I just do the tips. You'll want to work from the inside of your Halloween Tree out.

Brush a branch with glue. I just do the tips. You'll want to work from the inside of your Halloween Tree out.

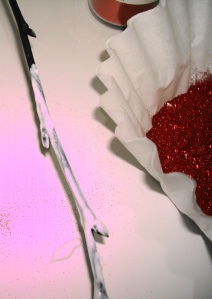
Spoon the glitter onto the glued branch.  Make sure to catch the excess in a coffee filter or on a piece of paper.

Spoon the glitter onto the glued branch. Make sure to catch the excess in a coffee filter or on a piece of paper.

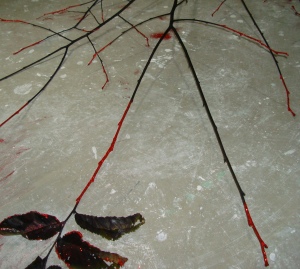
several branches glittered.  This is definitely the situation where more is better.

several branches glittered. This is definitely the situation where more is better.

In the next post, we’ll sit this bad boy up, and add some decorations. 
It’s going to make an awesome focal point.
You can actually use this idea in a lot of different applications.
I’ve done one for christmas, in all white and hung Christmas Ornaments that had our friernds
names written on them in gold marker.


Halloween Decoration via the Old Nasty Tshirt

Just keep cutting.

Just keep cutting.

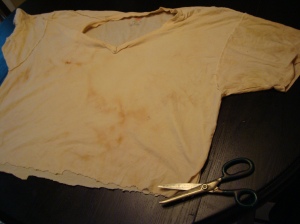
The other day when I was dying my paper for the Halloween Party invites, I also threw some old nasty t shirts into the dye (btw to make these color fast you can use vinegar, I didn’t bc I don’t plan on washing these EVER.)  Why?  For Halloween decorations, of course!  I had one batch of boiled onion skin dye, one pot of coffee dye, and one crushed walnut dye.  Actually the onion skins made a nasty pinkish dye that works rather well for Halloween.  The best part about these Halloween decorations is that they were FREE!

Here’s what happened.

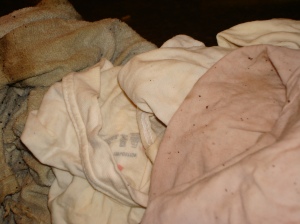
The Nasty tshirts and towel.  Pink onion, ecru walnut, and dingy coffee.
The Nasty tshirts and towel. Pink onion, ecru walnut, and dingy coffee.

The shirts after their dirty dye job.


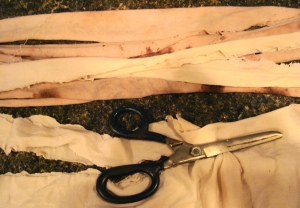
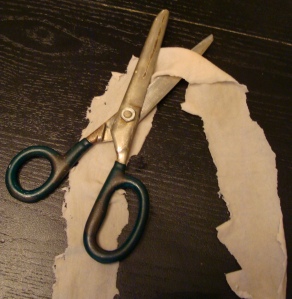
First I stretched out the shirt and cut it into strips.

First I stretched out the shirt and cut it into strips.


 4 inch strips are gonna work better.


Little ones curl in on themelves.


You'll actually have loops, not strips, so you need to cut one end of the loop.

You'll actually have loops, not strips, so you need to cut one end of the loop.

 
 If you have a rotary cutter, now’s the time to break that bad boy out.  It’ll go a lot faster.


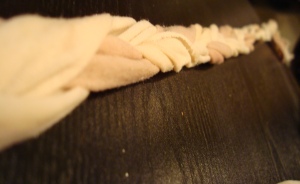
You can braid the strips and use as garland.  Add some yarn for texture, or anything else you have hanging around.

You can braid the strips and use as garland. Add some yarn for texture, or anything else you have hanging around.


 Some black or orange tshirts, maybe even red might be fun!


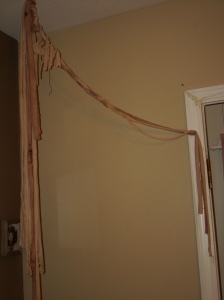
Then just hang loose.

Then just hang loose.


 Imagine a mummy or spider, or skeleton standing underneath.  Nice.  OR that cool Halloween Tree I’m going to show you in an upcoming blog entry!


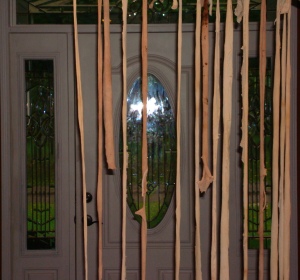
OR fun to add a little mystery as you walk in.  You could even cut up trash bags for this.  My photos kind of stink.  This is really a cool thing.  You could use the strips to make your mummy costume.  You could tie a bunch of stuff together with them, like a pile of plastic bones.  Or a cute little bow on stemware.  Vesatile suckers for a free item!  Love that. 
Tie them on a stick, or in this case, I used a table leg.  Now they are a spooky curtain.

Tie them on a stick, or in this case, I used a table leg. Now they are a spooky curtain.